The unique number, referred to as the "URN" (Unique Reference Number), will be
displayed on the "Review page" in "Interact." This identifier varies for each transaction,
whether uploaded individually ("Single") or in bulk ("Multiple" transactions).
Represented as a hyperlink, users can easily navigate to view the details uploaded
for each transaction.
In this specific section, users can efficiently manage transactions by pushing them
back, reviewing their history, and unlocking cases that have encountered failures.
The URNs are automatically locked during processing or updating of transactions.
If any exceptions occur or if a transaction fails, it enters a locked state. Robility provides
an option to unlock and push these cases back to the original queue, allowing users
to retry the process.
This robust functionality ensures that users have control over transactional processes,
enabling them to address issues promptly and efficiently. Furthermore, the option to
unlock cases provides a strategic mechanism to troubleshoot any processing hiccups.
This proactive approach aligns with Robility's commitment to user-friendly and effective
transaction management, promoting a seamless experience even in the face of
exceptions or failures.
How to unlock transactions?
1. Login to the Robility Manager and navigate to the respective project where
Interact is configured.
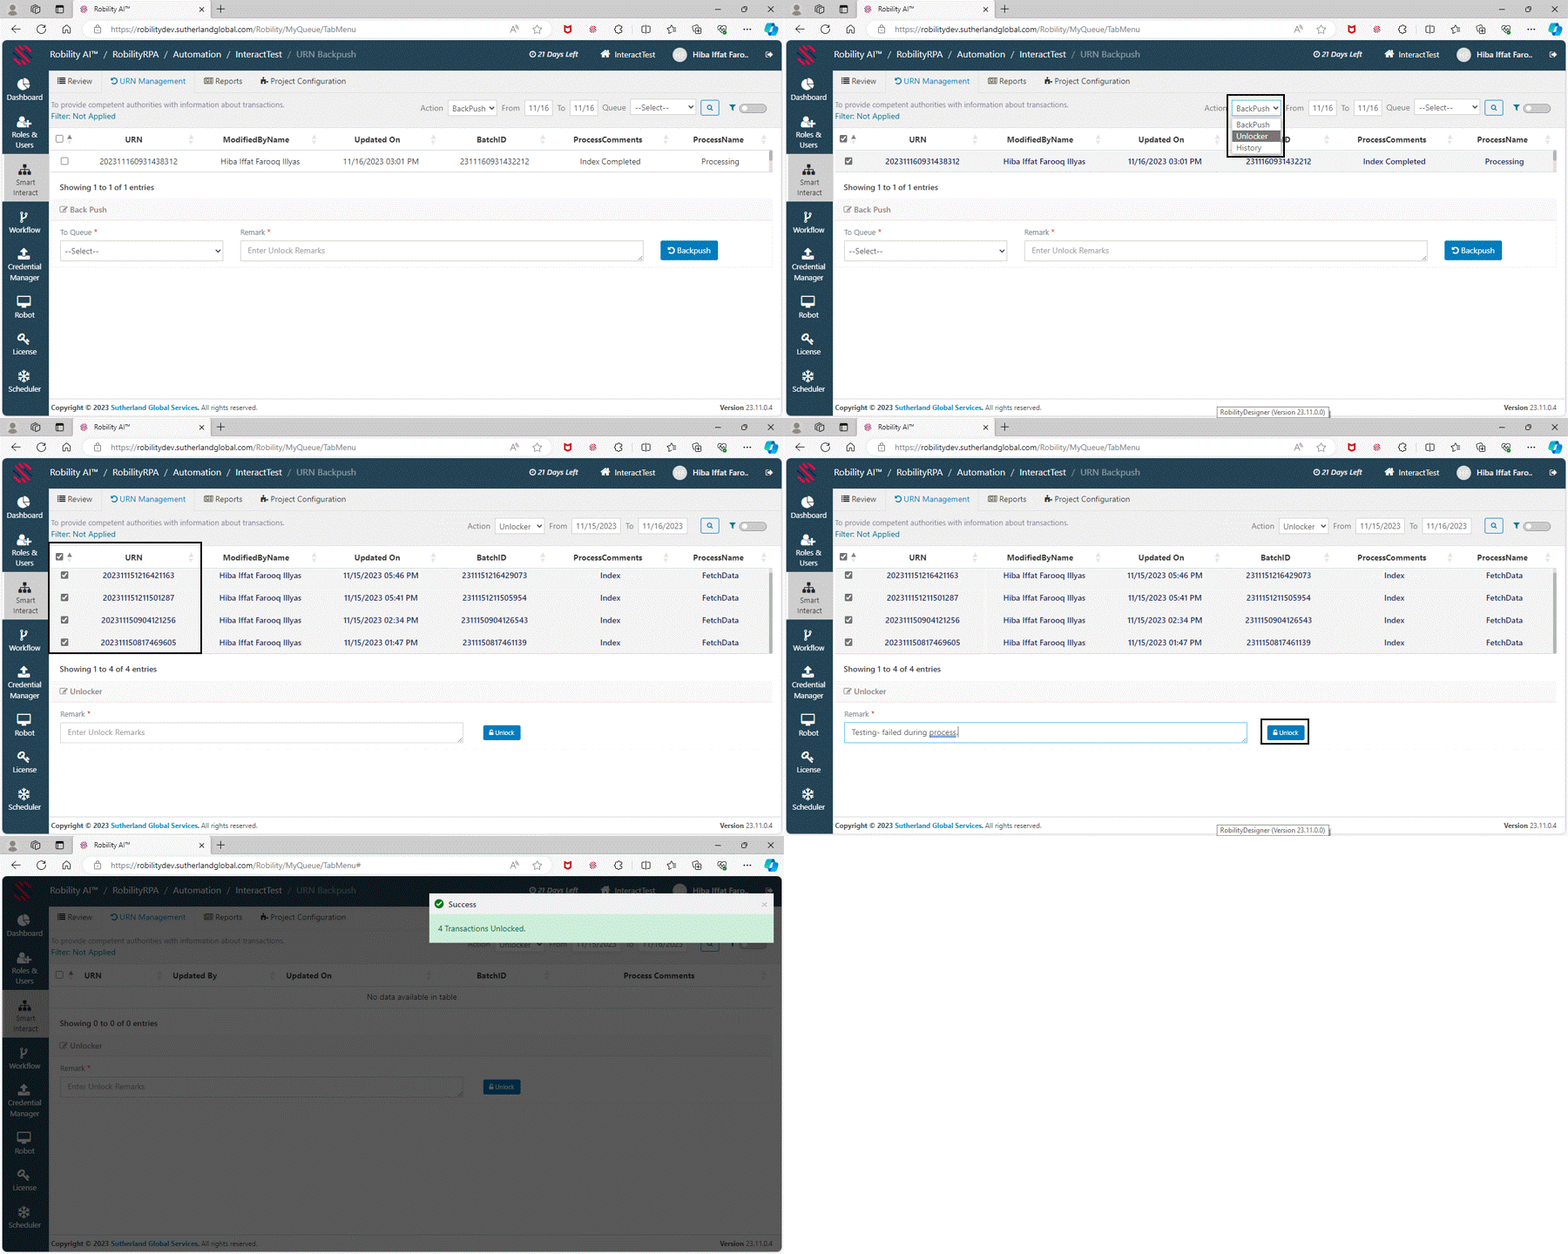
2. Click on “URN Management” page.
3. From the top right corner, select the “Action” drop-down and choose the “Unlock” option.
a. The transactions that are locked during the process will appear here.
b. Select the transactions that needs to be unlocked.
c. Provide “REMARKS” to unlock and click on the “Unlock” button.
4. The transactions will be unlocked and available in the respective queue.
How to backpush the transactions?
1. Login to the Robility Manager and navigate to the respective project where
Interact is configured.
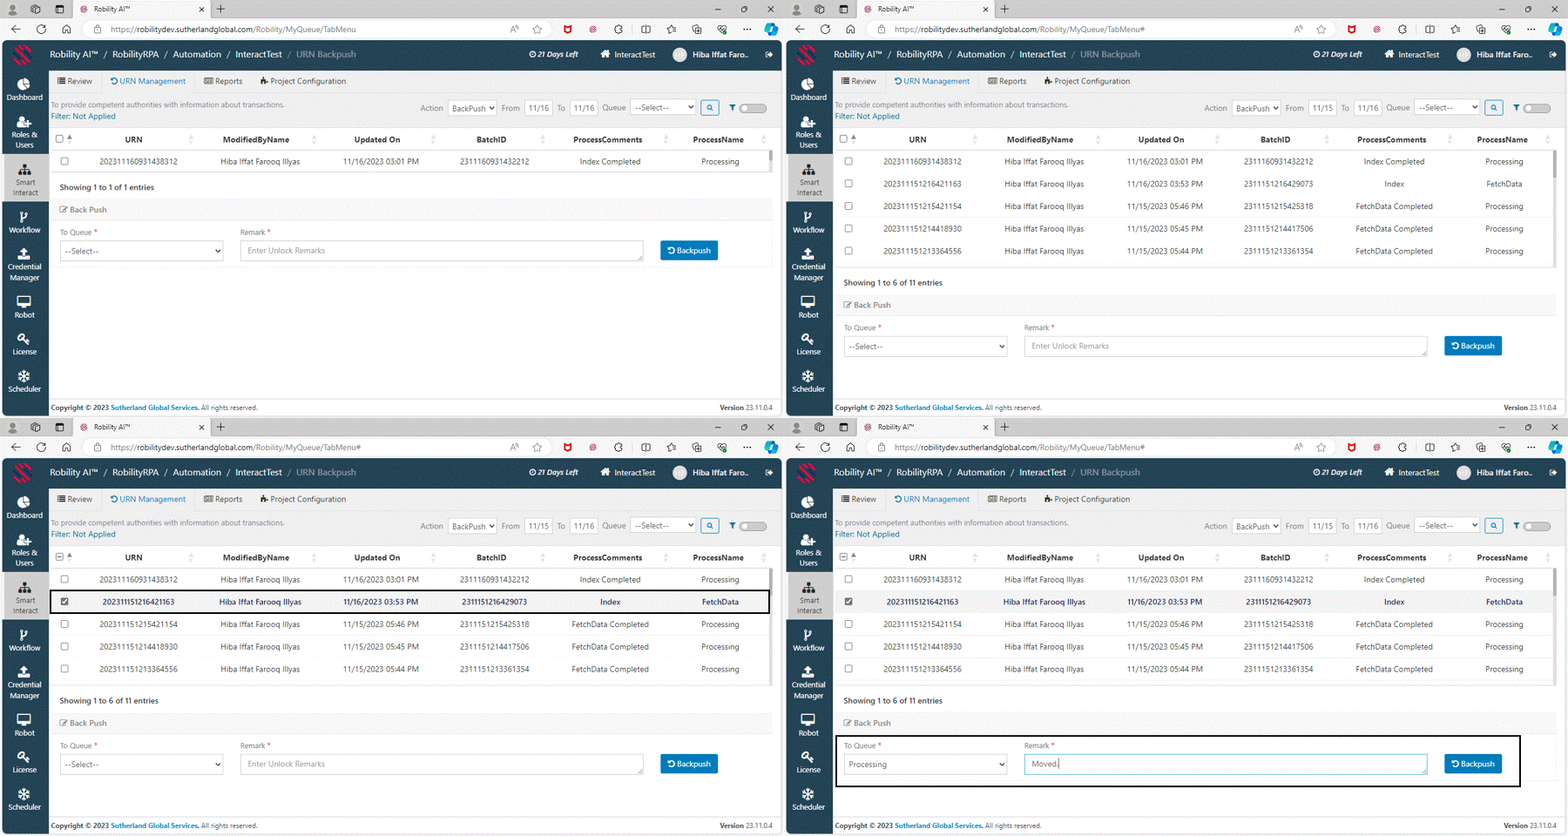
2. Click on “URN Management” page.
3. From the top right corner, select the “Action” drop-down and choose the
“Backpush” option.
a. The transactions that are available will appear here.
b. Select the transactions that needs to be back pushed to another queue.
c. Choose the queue from the “TO Queue” option.
d. Provide “REMARKS” to unlock and click on the “Unlock” button.
4. The transactions will be transferred to the specified queue.


