
The Robility Manager's function includes adding machines, creating projects,
and assigning robots to projects. The manager can send these designated
robots to the runner. To assign a Robot to the runner, we must first add a
machine, create a project, and then assign a robot inside the project.
Adding a machine
1. Publish the workflow from designer. (Click here to see how the workflow
is published).
2. Add a machine in runner by choosing the license type and machine name.
There are three types of licenses that we can choose from,
Unattended robots
Choose this type of license when the bot does not require any user intervention.
We can assign only one unattended bot to a machine.High Density Bots
Choose this type of license when a single machine has multiple users and does
not require any user intervention. This is also an unattended bot.
Attended Bots
Choose this type of license when the bot requires a user intervention during the
process.
To add a machine to the manager, click on add and fill in the mandatory details.
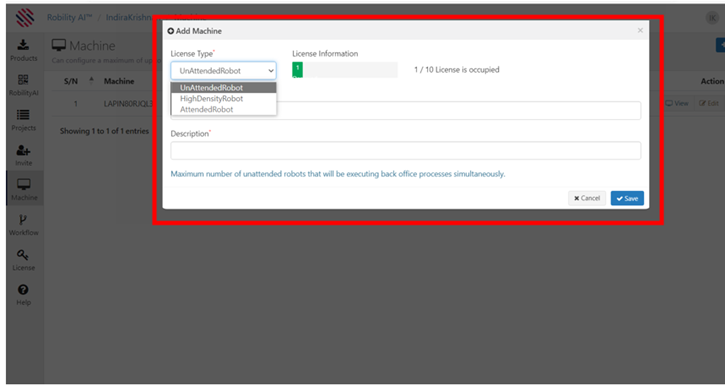
In the manager, there is room for up to 10 machines. We must purchase more
licences for the same if adding more machines is necessary. In order to achieve this,
go to the license tab on the home page and select the option marked "Buy license.
We can also view, edit, or remove the machine at any time.

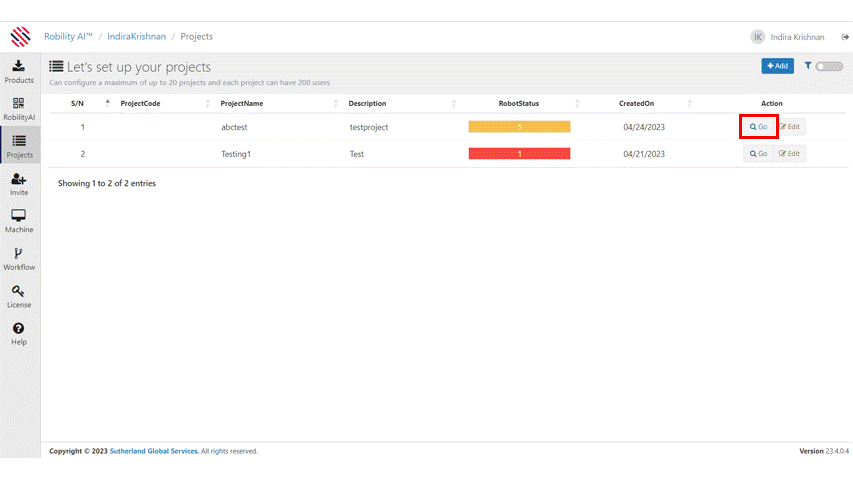
Assigning a robot to an existing project
There might be a situation where we might want to add another robot to an existing
project. Navigate to the projects tab from the main menu. Here we can see the projects
already created under this tenant.
To add another robot to an existing project, follow the below steps.
1. Select the desired project into which the robot must be added.
2. Click on Go against the project.
3. This takes you into the specific project.
To add a robot into the existing project, click on add and enter the robot details to
be added.

5. Click on save to add the robot to the project.
6. Once the robot is added, a key is generated for the respective robot.
View the below GIF to see how a robot is added to an existing project.
We can add a robot to any project by just clicking on Go against the project and
navigating to the robot section within the project.
Adding a robot to a project
To add a robot to a project,
1. Navigate to the projects section from the main screen.
2. Click on Go against the project. Here we are going to add a robot to the project
Testing 1.
3. Now we can see that there are no robots added to this project.
4. Click on add and enter the mandatory details. The username and password here
is the system username and password.
5. Click on save and the robot is added to the project.
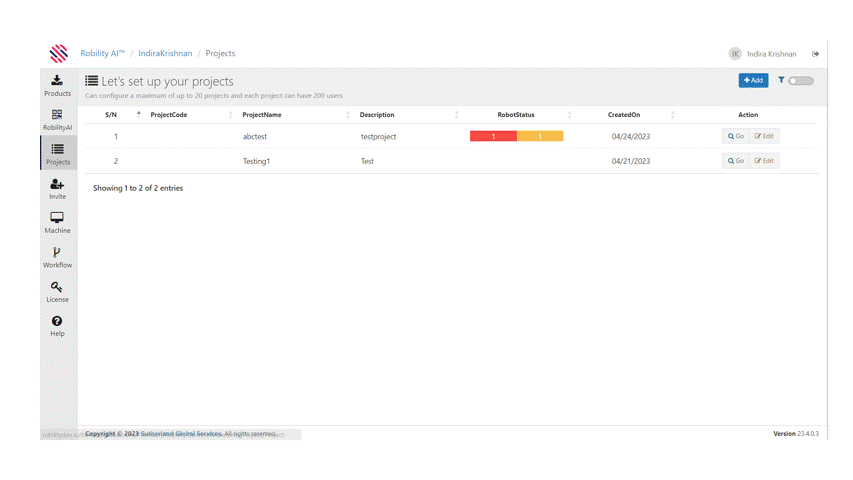
Robot Status and Colour Codes
Each project shows the number of bots assigned to that project and its status. This
is usually seen as number with a colour code respective to the project.
· When the robot status shows red with a number, it means that those many
numbers of robots are idle.
· When the robot status shows green with a number, it means that those many
numbers of robots are running.
· When the robot status shows yellow with a number, it means that those many
numbers of robots are in ToCheck.
· When the robot status doesn’t have any number or colour code to it, there are
no robots assigned to that project.
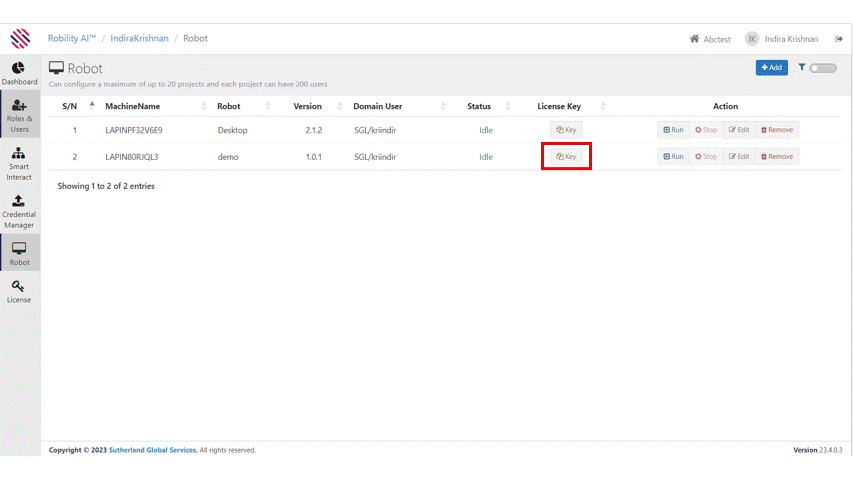
Connect to runner with the license key
Let’s see how to copy the key of the robot from the project “Abctest” and
connect it to the runner
1. Copy the key which is the activation code for the respective robot in runner by
clicking on the copy button.
2. Launch the runner and enter the copied key to the activation code and click on
connect.
3. Refer the GIF below to see how the robot is connected to the runner.
Execution of the bot in Runner
Once the activation code has been entered in runner, the bot is ready to run.
(Activation code is the key mentioned against the robot)
To execute the bot in the runner,
1. Open the project screen in the manager.
2. Click on Run against the project. It gives a message that the robot is initiated
successfully.
3. We also get a pop-up message from the system tray. “Request received to run. “
4. Once it is completed a message is popped up from system tray. “Run completed”.
in the designated machine.