
Each organization and department have different automation needs. Based on the
requirement, different projects are created, and robots are assigned accordingly.
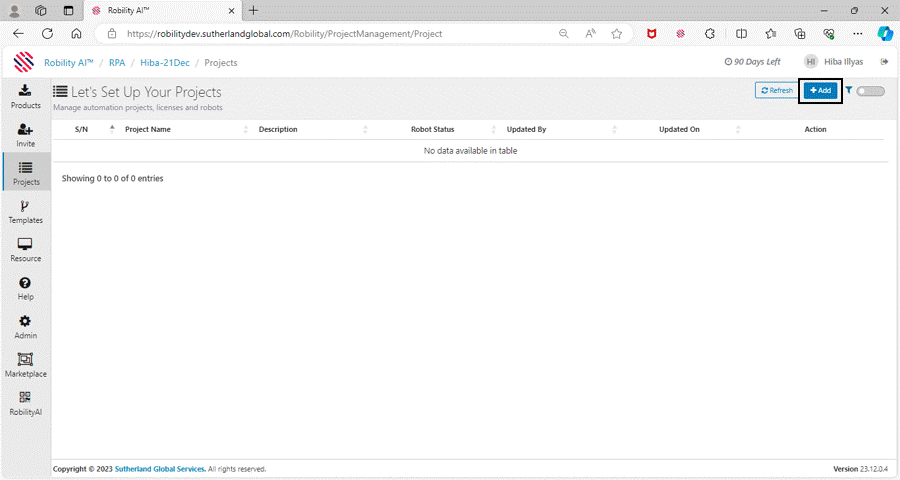
How to navigate to projects?
1. Login to Robility AI™
2. Click on projects from the main menu.
3. We can see all the projects created under this tenant.
How to add a project?
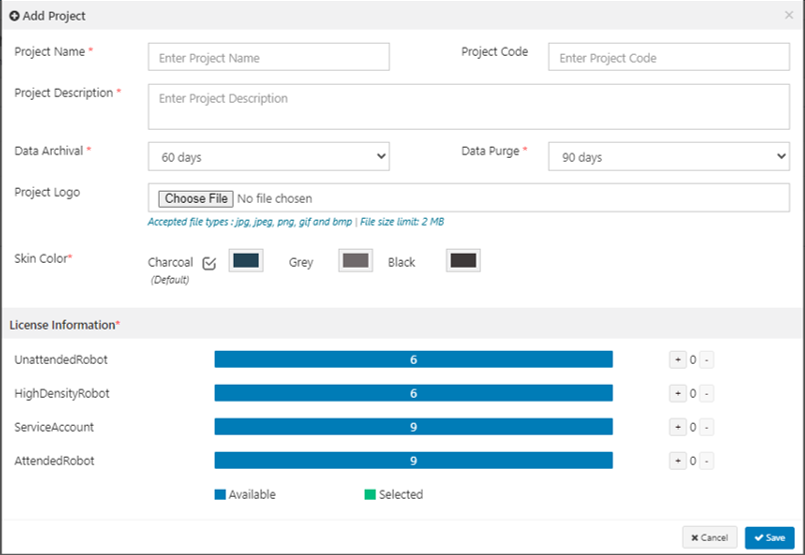
1. Click on add from the right-hand side top corner.
2. An add project screen will pop up.
3. Fill in all the mandatory fields.
|
|
Default Settings |
ProjectName: Indicates to specify the name for your project to start automation. |
|
Project Code: Indicates to specify the “Code” for unique identification during the automation. |
||
|
Project Description: Indicates to specify the description of what your automation project does. |
||
|
Data Archival: Indicates to choose the period of time to archive the data utilized inside the project. |
||
|
Data Purge: Indicates to choose the “Expiry” date of your project. Once the project has expired, “Credential vault” and “Interact” keys will also expire. |
||
|
Project Logo: Indicates to choose the “Logo” of your project. |
||
|
Skin Color: Customize your project’s skin color with options available. By default, “Charcoal” will be selected. |
||
|
License Information |
UnattendedRobot: Every project will be provided with 10 licenses for “Unattended Robot” on Enterprise version. You can allocate the license based on your requirement here. |
|
|
HighDensityRobot: Every project will be provided with 10 licenses for “Highdensity Robot” on Enterprise version. You can allocate the license based on your requirement here. |
||
|
ServiceAccount: Every project will be provided with 10 licenses for “Service account” on Enterprise version. You can allocate the license based on your requirement here. |
||
|
AttenededRobot: Every project will be provided with 10 licenses for “Attended Robot” on Enterprise version. You can allocate the license based on your requirement here. |
View the above Gif to see how to add a project.
Let’s get into further details about the project page.
![]()

1. Serial number: Shows the number of projects under this tenant.
2. Project Name: Shows the project name created by the client.
3. Description: Shows the description given against the specific project.
4. Robot Status: Shows a number and colour code depending on the status of
the robot inside a project.
a. Blue: When the robot status shows red with a number, it means that those
many numbers of robots are idle.
b. Green: When the robot status shows green with a number, it means that
those many numbers of robots are running.
c. Yellow: When the robot status shows yellow with a number, it means that
those many numbers of robots are in ToCheck.
d. No Color: When the robot status doesn’t have any number or colour code
to it, there are no robots assigned to that project.
5. Updated by: Displays the username who has updated the project recently.
6. Updated On: Shows the date in which the project was updated.
7. Action: There are two different actions that can be performed in a project.
a. Edit: Click on this to make any changes to the project.
b. Go: Click on this to get into the project’s command center where we can
add the robots to be deployed to the machines.
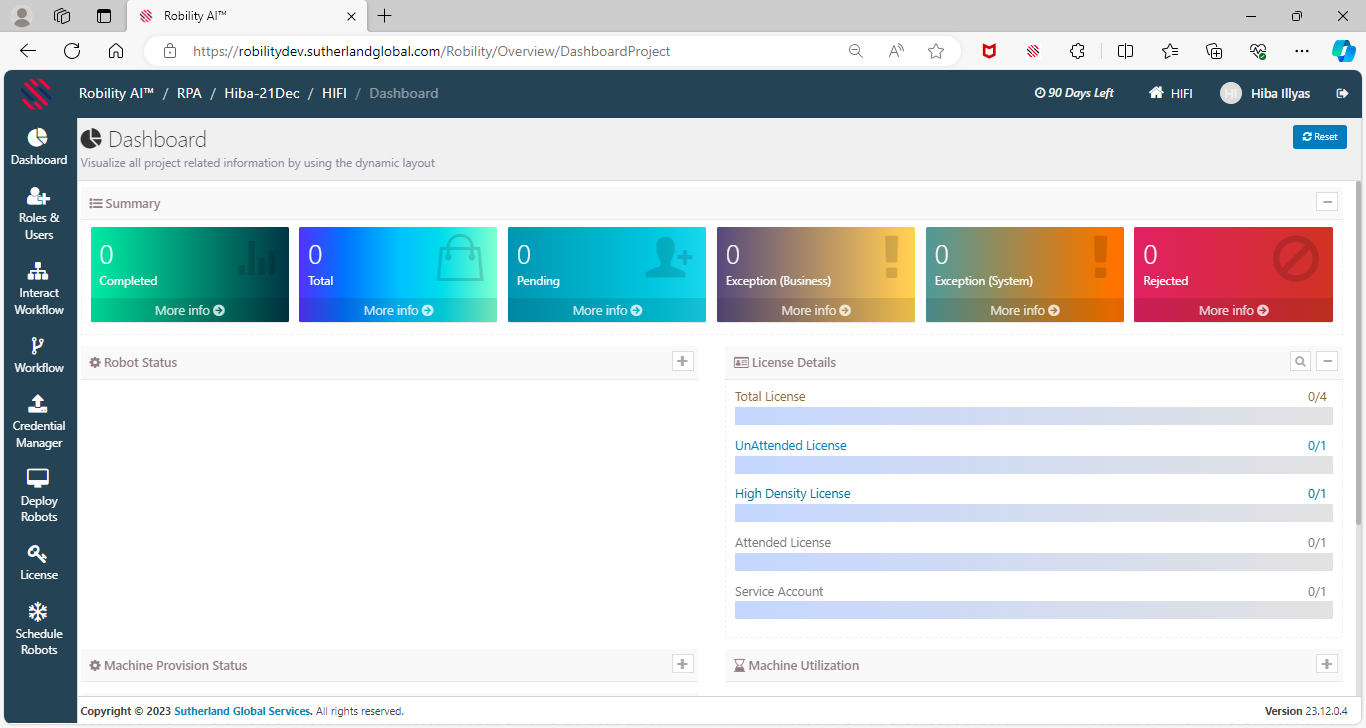
What can be seen on the command center screen?
1. Dashboard: This screen overviews the status of all the bots under the project, number
of machines utilized and summary of the projects automated from "Interact."
2. Roles and Users: This menu is used to invite users to the current project and assign
different roles based on the work assigned to them.
3. Interact: RobilityInteract’ s advanced features make it a powerful tool for
businesses seeking to enhance their automation processes. Click here to get
more information.
4. Workflow: This menu list downs the workflows published within the "Project"
from Designer.
5. Credential Manager: This is useful for keeping the tools or applications credentials
always secure. Click on it to configure and start to set up your vault credentials.
To get more information, refer the documentation of Credential Manager.
6. Robot: This menu allows the user to map and manage the "Robots" assigned
inside the project.
7. License: This menu allows the "Project admin" to request more licenses
required for the Project.
8. Scheduler: This menu allows the user to schedule and manage the bots
and machines here.