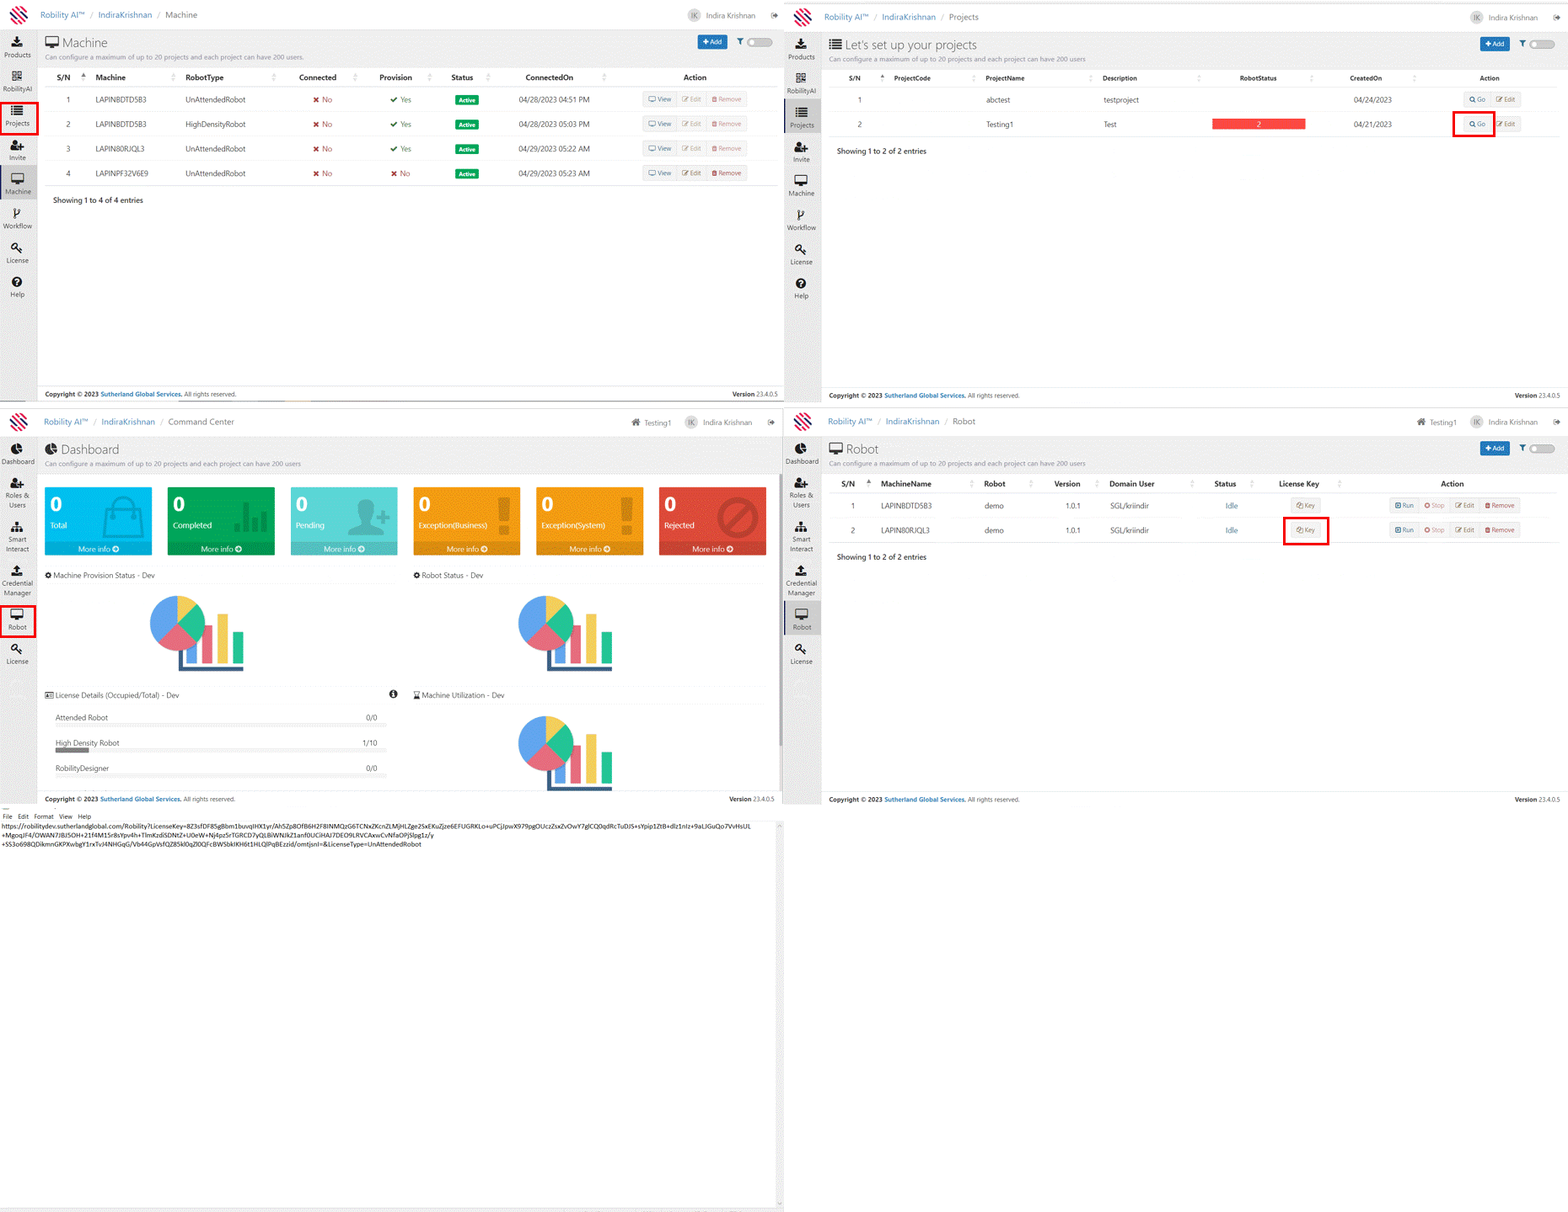
The Robility manager is a platform where we add machines, create projects,
and add robots. Different projects have different automation needs and the
workflows are designed accordingly. When we want to add the same machine
to a different project, we first have to remove the machine from the current
project and then add it to the new project.
How to remove a machine?
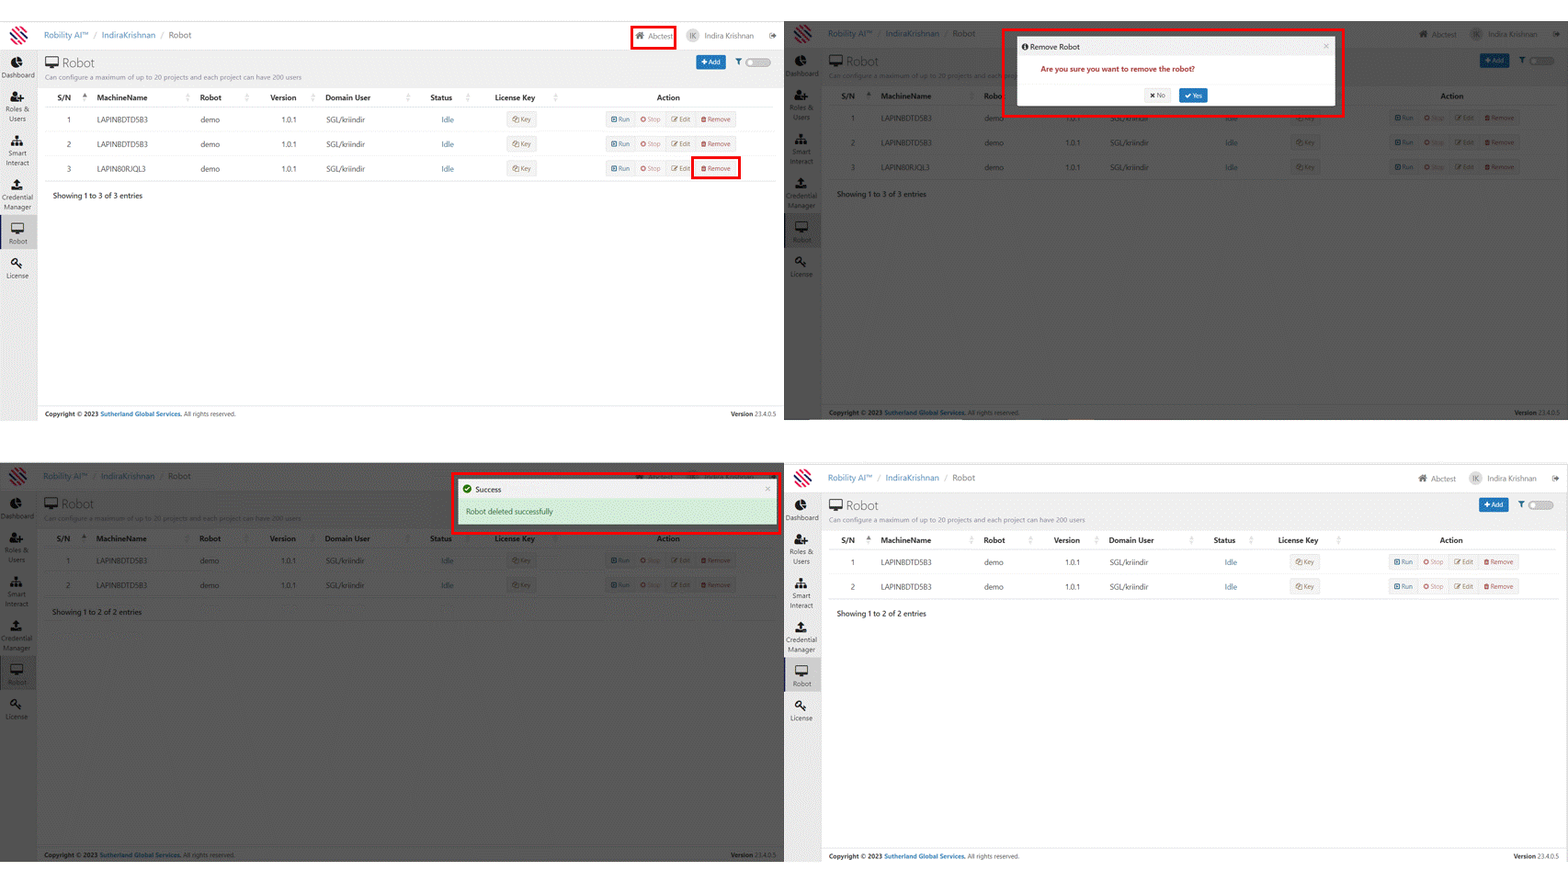
1. Navigate to machines from the main menu.
2. Click on remove against the machine that you wish to remove.
3. Click on Ok and the machine is removed successfully.
View the below GIF on how to remove a machine from the manager.
How to navigate to a different project?
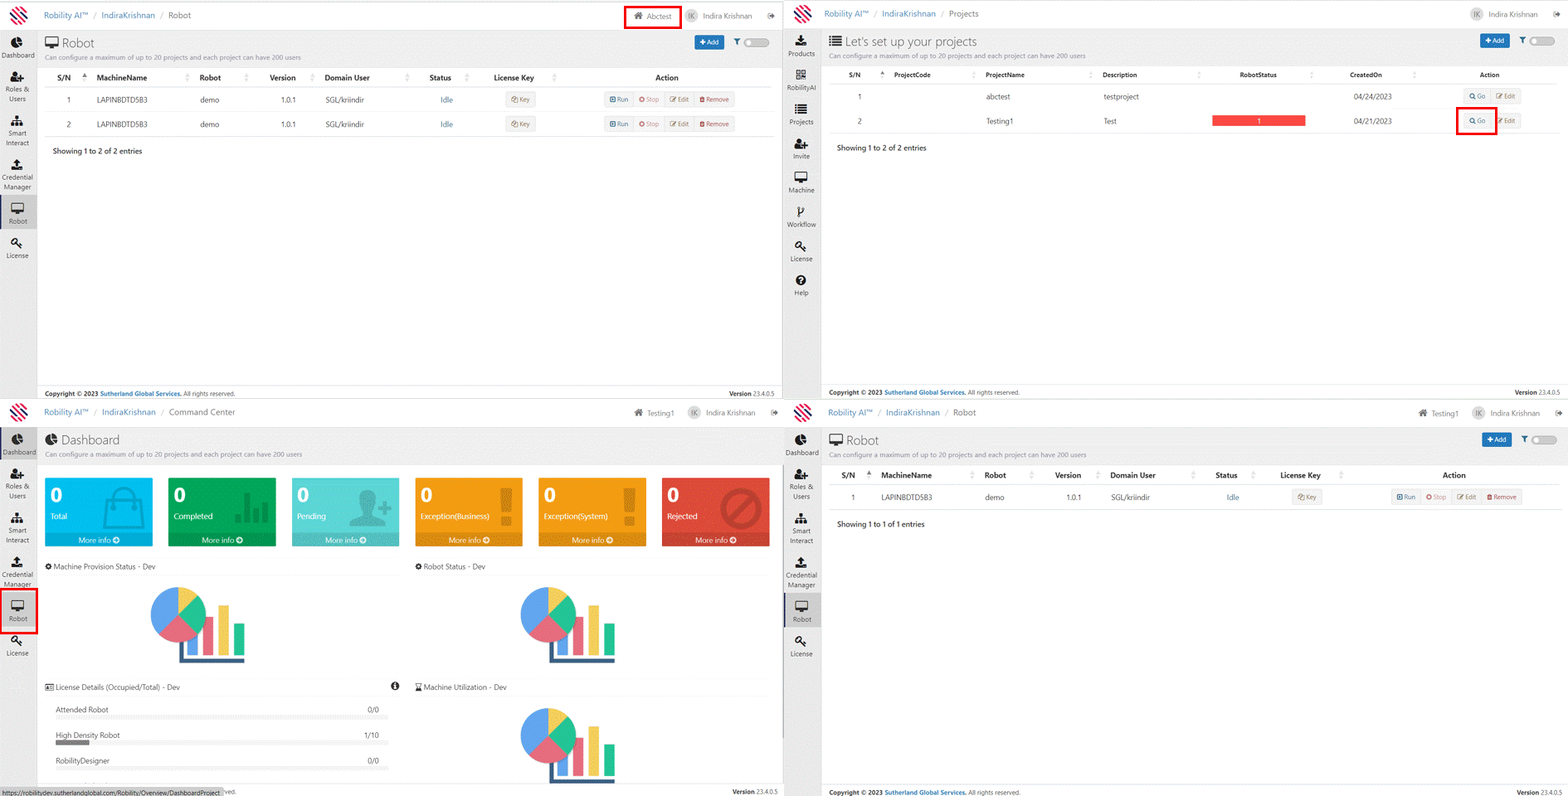
To navigate to a different project,
1. Click on the name of the project in the project screen. Here it is “Abctest”
2. It will navigate to the projects screen of this tenant which will have all the
projects under this tenant.
3. Click on Go against the project into which you would like to make changes.
Here it “Testing 1”.
4. Click on the Robot menu of this project screen to add any robots.
How to add the robot which was removed from
a project to the current project?
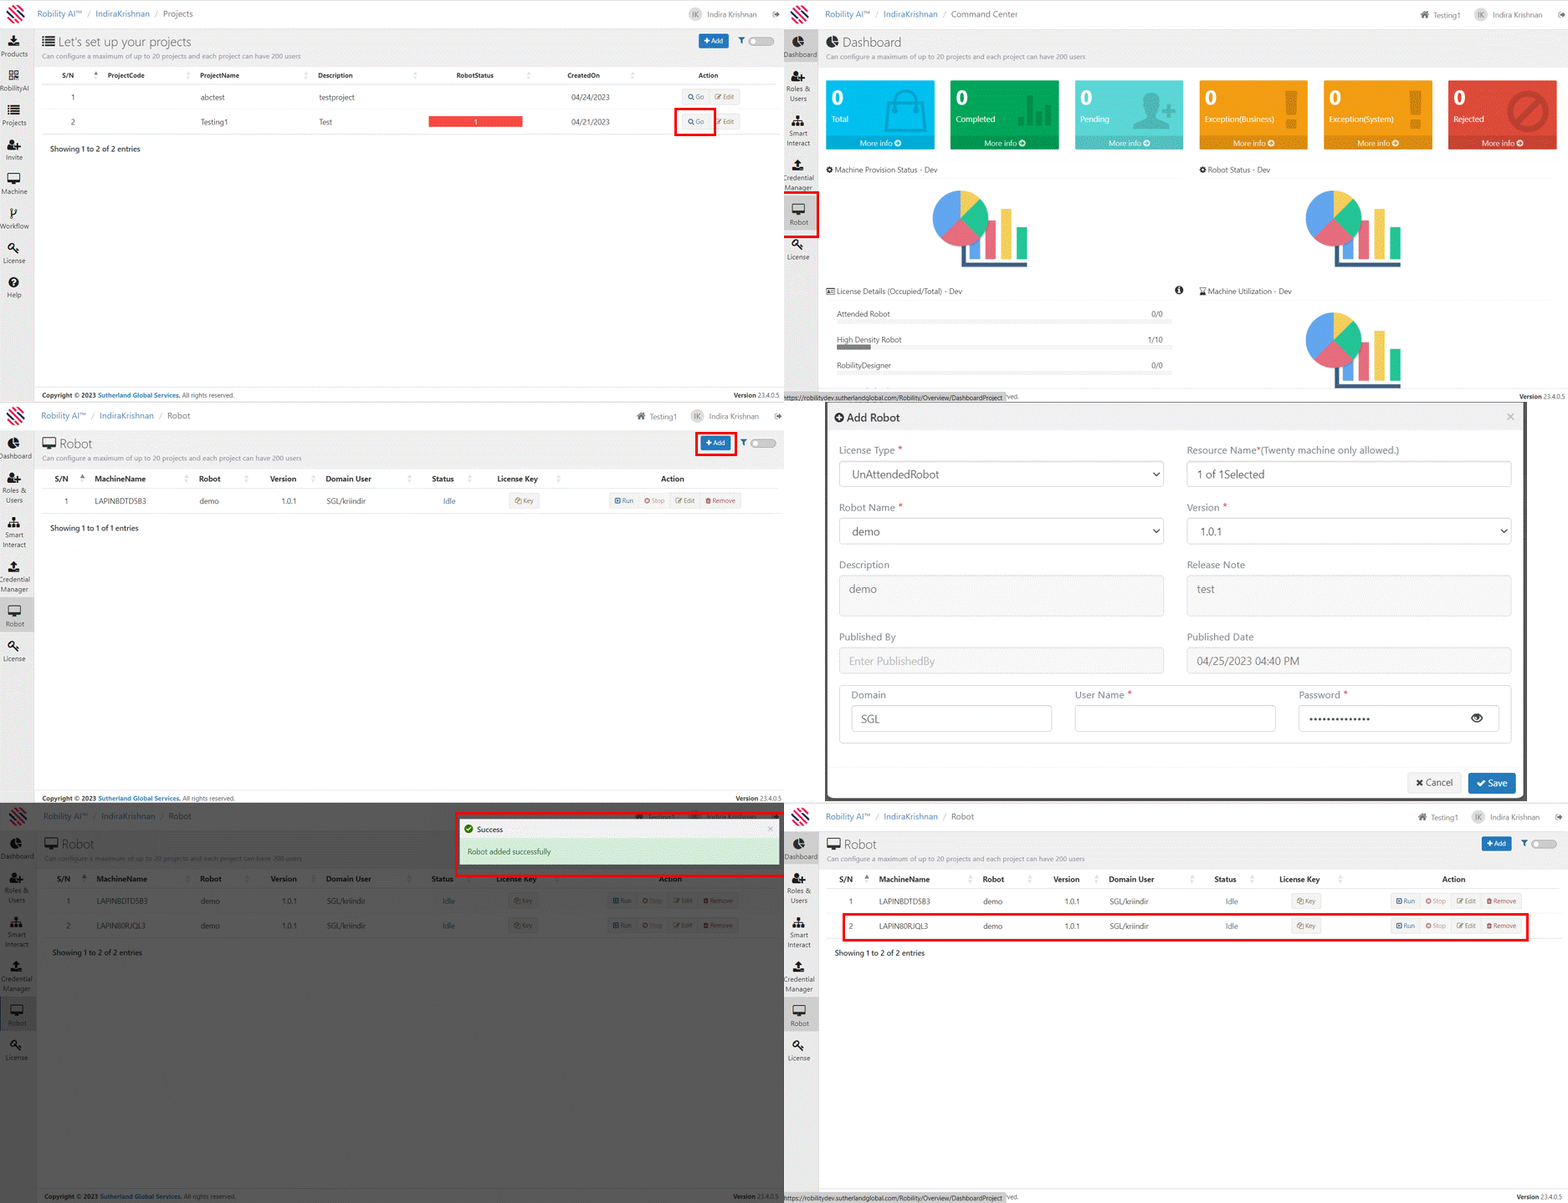
Here we are going to add the robot to the project Testing1.
1. Click on Go to navigate into the project where the robot has to be added.
2. Click on Robot from the main menu of projects and click on add.
3. Choose the machine deleted from the earlier project to be added to this
project.
4. Click on save and the machine is added to this project.
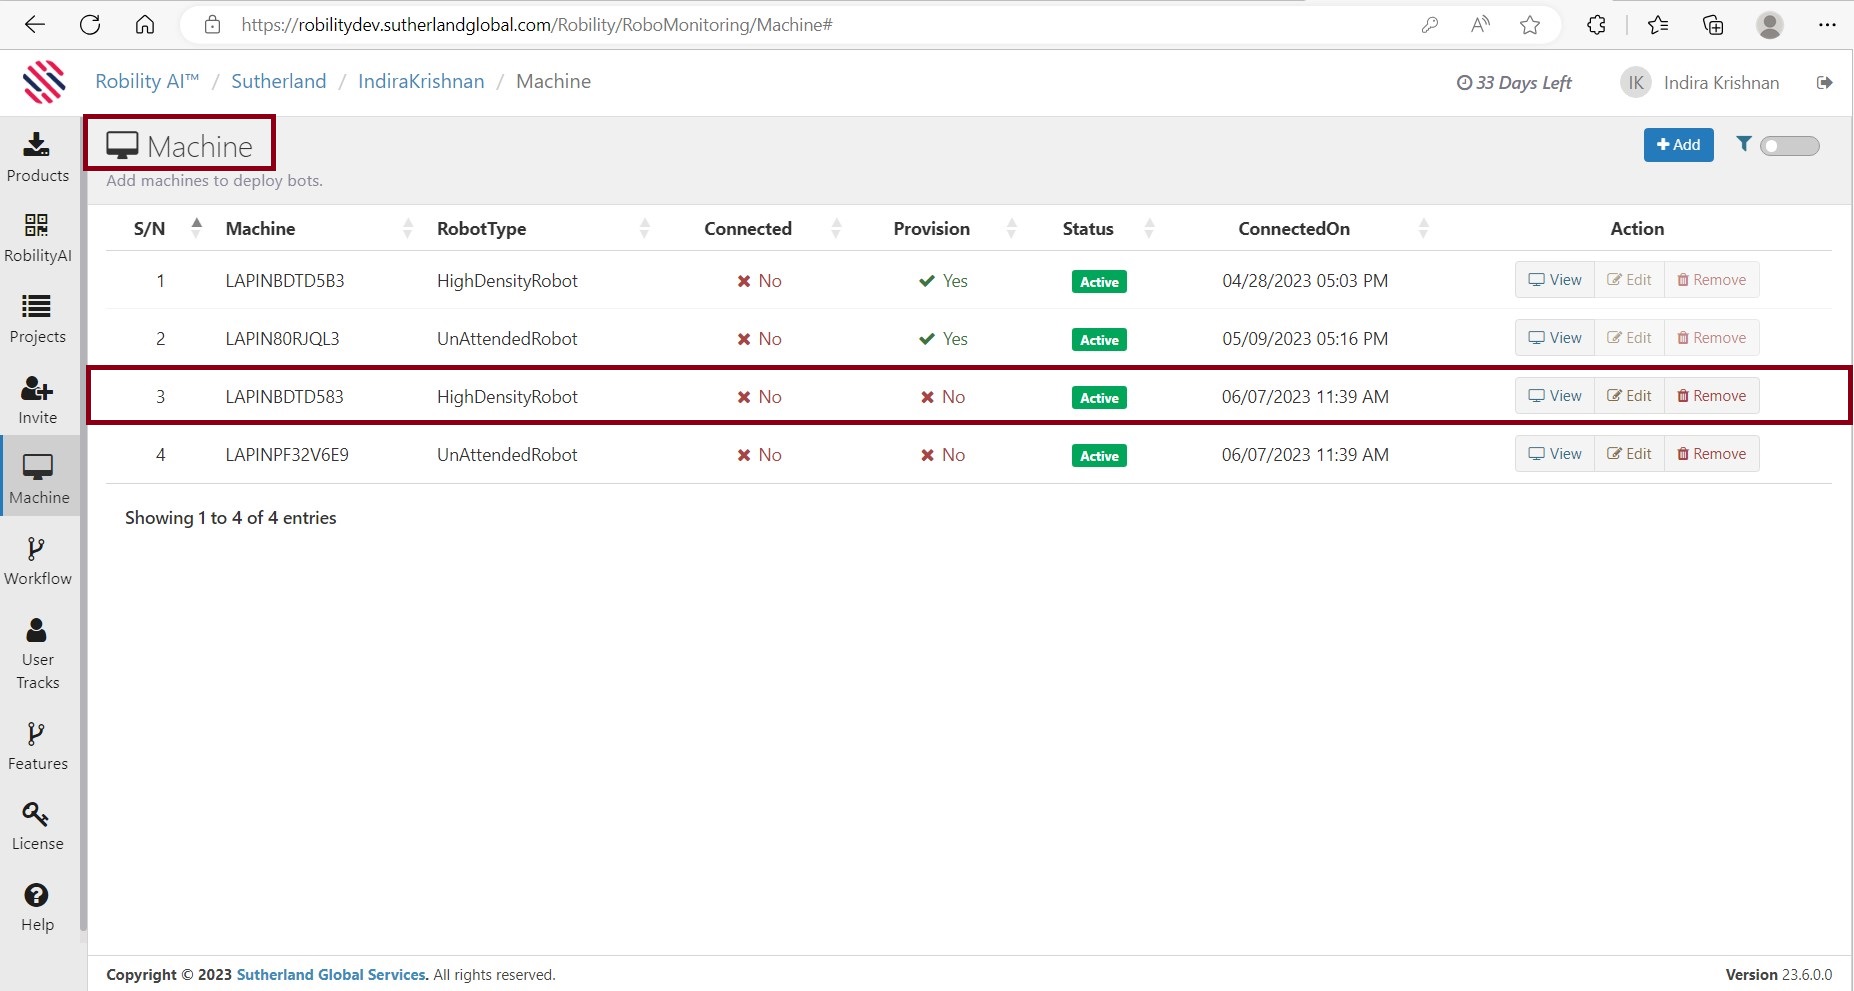
This is called provisioning and once this is done, we can see that the
provision status in the machine screen changes from red cross to green tick
mark. (Refer image below)
How to copy the key for the assigned robot?
1. Navigate to the projects into which the robot for which the key has to
be copied is added. Here it is Testing 1
2. Click on the key against the machine name.
3. The key is copied.
4. Open a notepad and paste the copied key into the notepad.
How to disconnect the current bot from the
runner and enter the copied key?
1. Open the runner and navigate to the settings screen.
2. Click on the disconnect icon from the right-hand side top corner.
3. Click on yes in the pop-up message to disconnect the runner.
4. The runner gets disconnected and comes back to the login page.
5. Enter the copied license key as the activation code.
How to connect this robot to the runner?
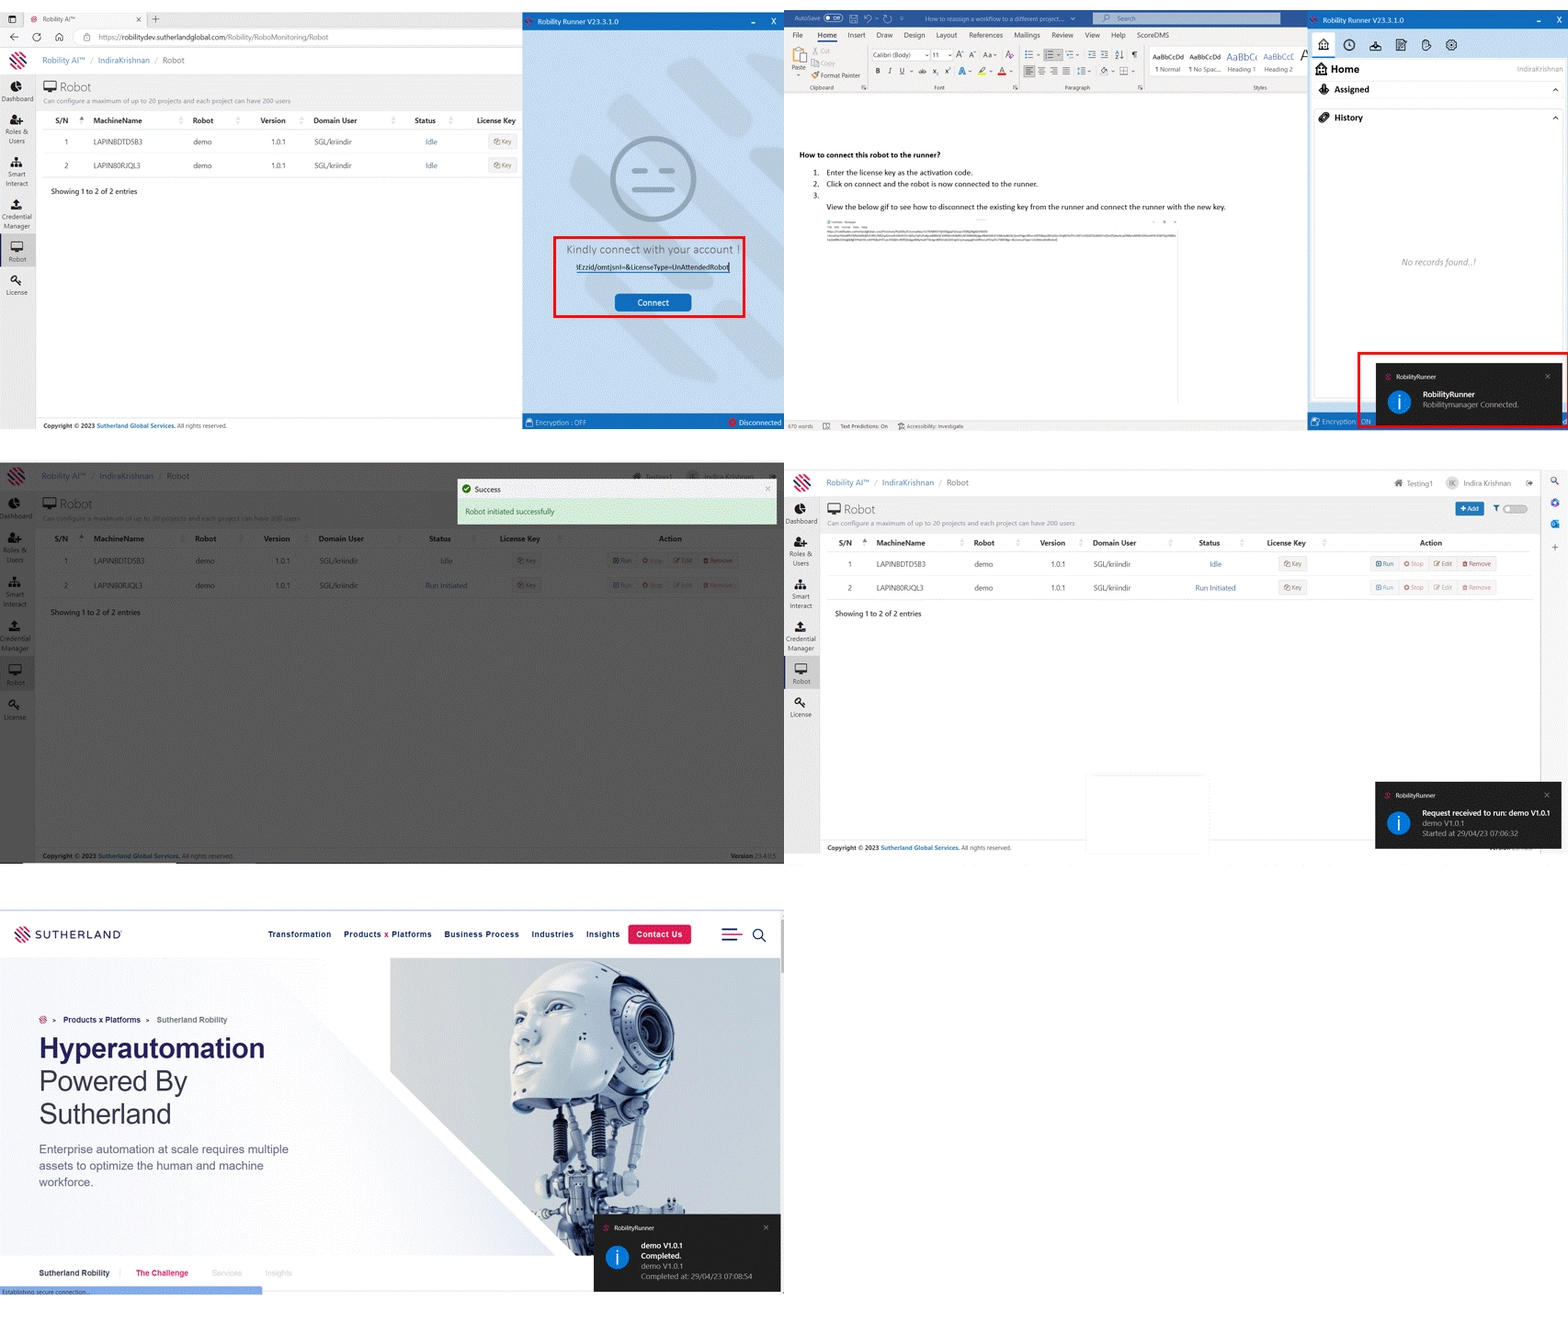
1. Enter the license key as the activation code.
2. Click on connect and the robot is now connected to the runner.
3. Navigate to the project screen of the manager.
4. Click on run against the robot for which the key is copied.
5. The run is initiated, and the bot is executed.
View the below GIF to see how the robot is connected and executed.
Once the run is completed in the runner, the status in the manager
changes to idle again.

