
This activity facilitates users in providing input text as a string to specified
applications, supporting both desktop and web applications.
Technical Reference
|
|
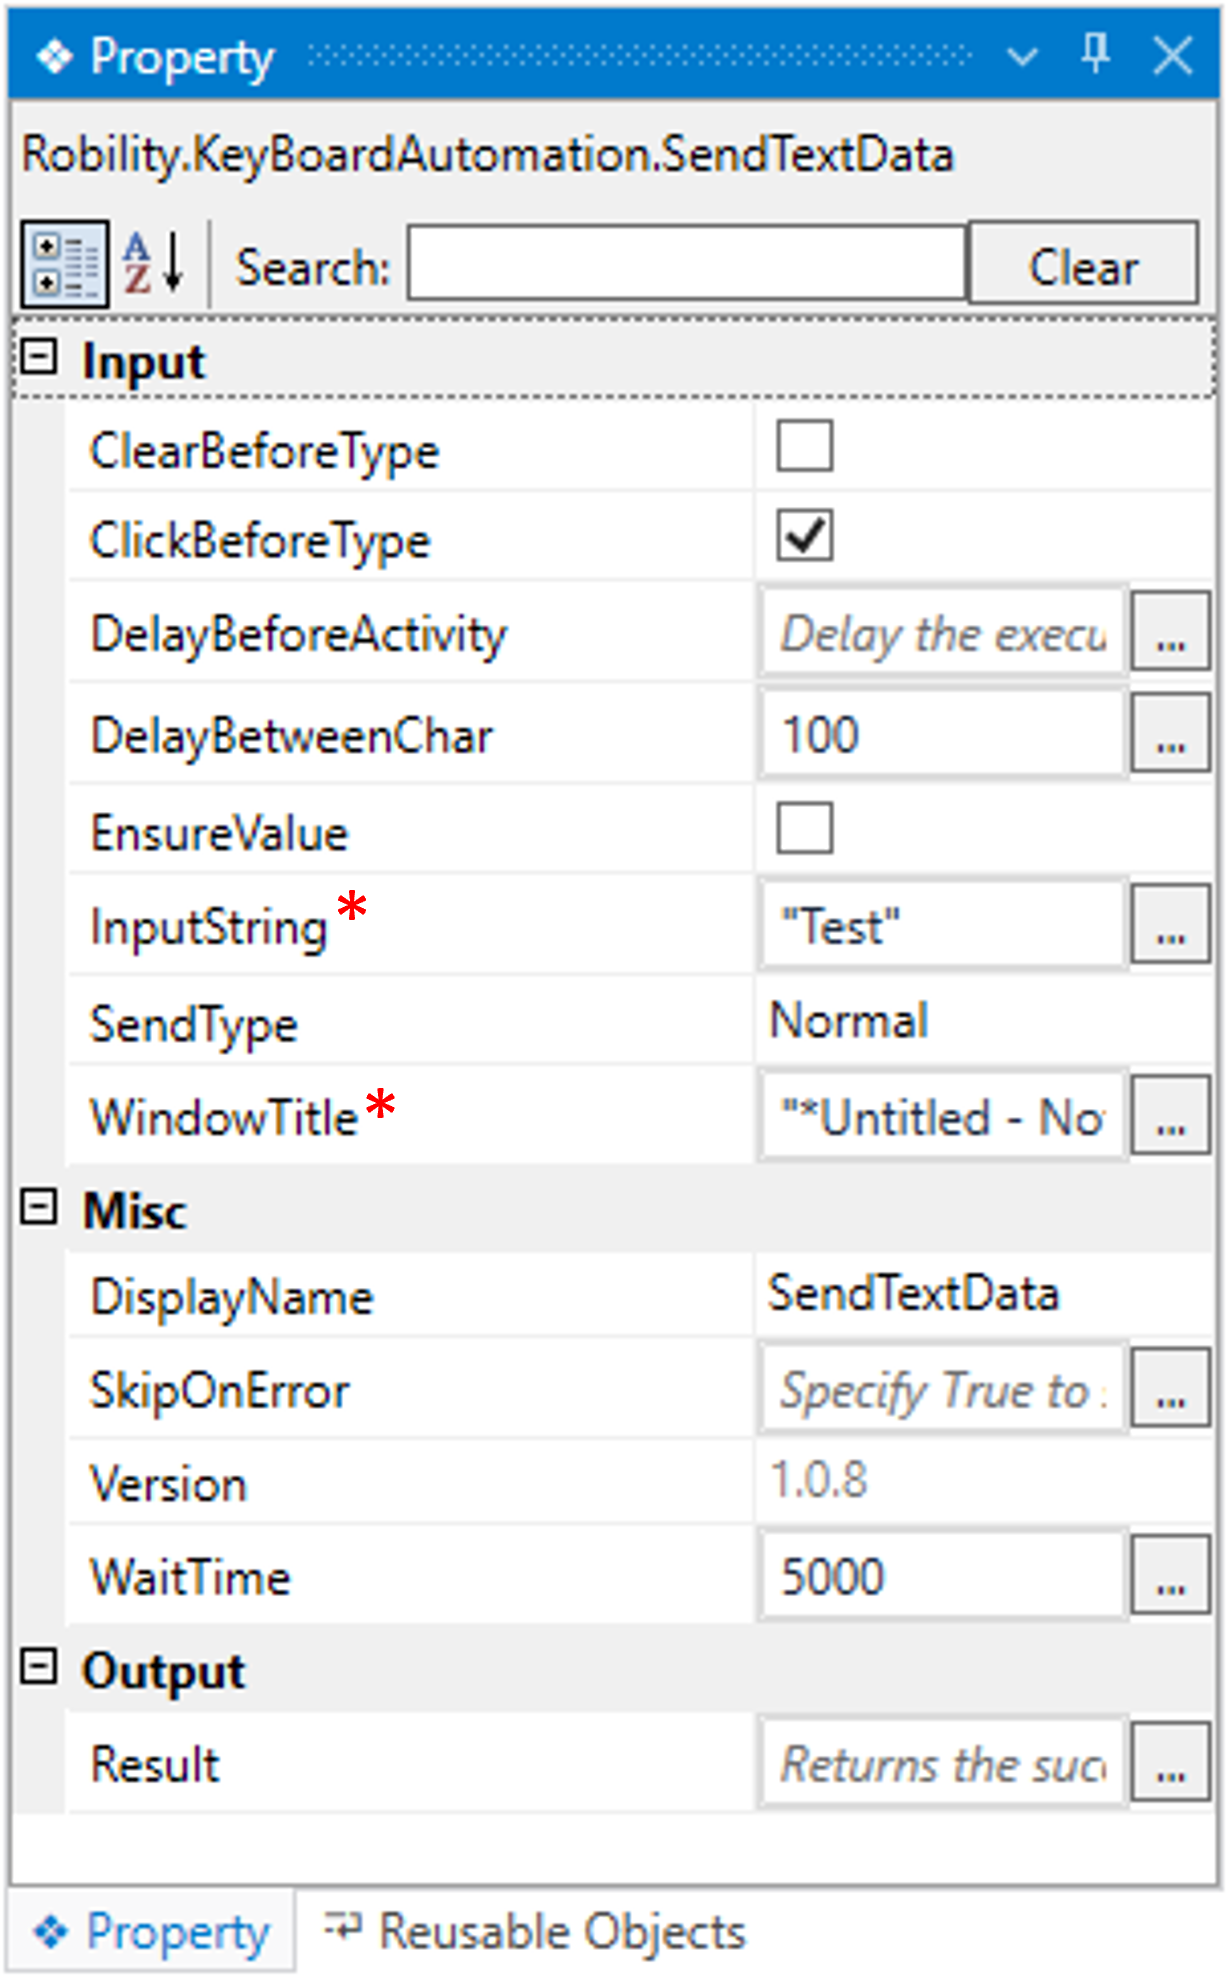
INPUT |
ClearBeforeType: When this box is checked the bot clears the existing data in the application and types the given text.
|
|
ClickBeforeType: When this box is checked the bot places the cursor on the visible application before initiating the execution of the activity.
|
||
|
DelayBeforeActivity: It assists the user to add a delay before initiating subsequent activities. |
||
|
DelayBetweenChar: It assists the user to add a delay between the characters in milliseconds.
The delay duration here is in milliseconds. By default, it is set to "300" milliseconds. |
||
|
EnsureValue: It indicates the user to ensure whether the value has been entered in the specified window.
By default, It will be left unchecked. |
||
|
InputString: Specify the text to be passed or set in the specified window.
You have the option to either hardcode the values in the “String” variable or pass the values as “String” datatype.
This parameter accepts values in “String” datatype. |
||
|
SendType: Indicates to choose the dropdown value based on what pattern the text must be entered in the application. Key_as_user: Enters the text as the human does. Normal: Enters the text naturally as how bot functions. Paste: Enters the text as in copy paste pattern. Characters: Enters the text as character by character. |
||
|
WindowTitle: This parameter specifies to choose the applications from the list of active applications to where the text needs to be inputted.
You have the option to either hardcode the values in the “String” variable or pass the values as “String” datatype.
This parameter accepts values in “String” datatype. |
||
|
MISC |
DisplayName: Displays the name of the activity. The activity name can be customized, which aids in troubleshooting. |
|
|
SkipOnError: Specify the "Boolean" value as "True" or "False."
True: Continue executing the workflow regardless of any errors thrown. False: Halt the workflow if it encounters any errors. None: If the option is left blank, the activity will, by default, behave as if "False" were chosen. |
||
|
Version: It indicates the version of the feature being used. |
||
|
WaitTime: It enables the user to introduce a delay before initiating subsequent activities. The delay is specified in milliseconds.
By default, it is set to zero milliseconds. Leaving the option blank will result in no delay being applied. |
||
|
OUTPUT |
Result: It provides the ability to view the execution status of the activity. It returns values in "Boolean."
True: Indicates that the activity has been executed successfully without any errors. False: Indicates that the activity has been unsuccessful due to an unexpected error being thrown. |
* Represents mandatory fields to execute the workflow.
Here’s an example of how the “SendTextData” activity works –
The following example illustrates how we are going to clear and enter the text in
the Word document which already contains data in it by using the Send text data
activity. In the following example, we have already launched the Microsoft Word.
Let’s get into the example.
1. Open the Designer and create a workflow.
2. Drag and drop the SendTextData to the workflow.
3. Double click on the activity and use the screen on option to choose the Word
window from the active windows on screen dialog box.
4. Click on “Ok”.
5. Enter the data to be entered in the input string within strings. Here the data we
enter is “Unattended bots can run on their own, providing end-to-end automation
for processes, usually in the back office. They can operate on a preset schedule
or activated by logic in the process flow.”
6. Now, to clear the data before typing, check on the Clear before type box.
7. Navigate to the properties and declare a variable in the result box of the output
segment. Here it is “Test” .
8. This variable is declared to check the activity has been executed successfully.
9. Drag and drop a write log activity below the send text activity.
10. Enter the variable as “Test.ToString”.
11. Enter the log level as “info”
12. Execute the workflow.
The bot executes the activity and enters the data in the specified field and
also gives the output as True in the output box.