
This activity can be used when we are passing data which is sensitive or confidential
to the webpage. Use this activity with a secure string variable type when a string
or text needs to be protected while being processed.
Technical Reference
|
|
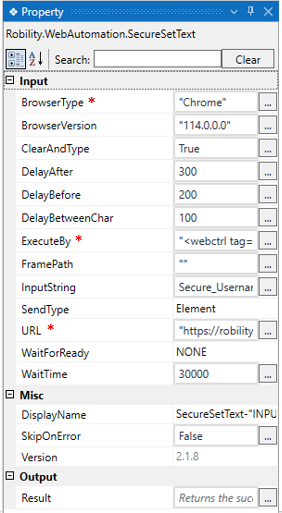
INPUT |
BrowserType: Indicates the type of browser from which the element is detected. Supports Google Chrome and Microsoft Edge Chromium. This fields get auto- filled after the element has been chosen. This is a mandatory field. |
|
BrowserVersion: Indicates the version of the browser in use. This fields get auto- filled after the element has been chosen. This is a mandatory field. |
||
|
ClearAndType: Indicates if the specified field for the input string should be cleared before entering the data. Specify True to clear and write the data and False to not to perform this functionality. This is not a mandatory field. |
||
|
DelayAfter: It specifies the delay time after the execution in milliseconds. By default, it will be 300 milliseconds. It can be increased or decreased. This is not a mandatory field. |
||
|
DelayBefore: It specifies the delay time before the execution in milliseconds. By default, it will be 200 milliseconds. It can be increased or decreased. This is not a mandatory field. |
||
|
DelayBetweenChar: It specifies the delay time between the characters in milliseconds. By default, it is set to 100. This is not a mandatory field. |
||
|
ExecuteBy: Indicates the element values/attributes that has been chosen from the spy window after detecting it on the hovered webpage. This field gets auto- filled after the element has been chosen. This is a mandatory field. This field supports only string value. |
||
|
FramePath: Gets auto filled, once the element is indicated in the web page using Robility Spy. The frame path is auto filled only if the selected element has a frame ID in the webpage. |
||
|
InputString: Indicates the text to be entered in any field or textbox on the webpage. This field accepts only secure string variable. This is a mandatory field. |
||
|
SendType: We can choose the dropdown value based on what pattern the text must be entered in the text field. The options are, · Element- Sends the values as element type. · Paste – Paste the characters as how the paste functionality works. · Characters - Sends the values by characters. |
||
|
URL: Indicates the URL on which the text needs to be entered on the webpage. This fields get auto- filled after the element has been chosen. This is a mandatory field. |
||
|
WaitForReady: Select from the drop-down list. None – It does not wait for any anything until the detected element is appears on the webpage. Interactive- When chosen it clicks the element even before the browser loads completely. Complete-When chosen it clicks the element after the browser loads completely. This is not a mandatory field. |
||
|
WaitTime: It specifies the wait time in milliseconds to run. By Default, it is 30000 milliseconds. This can be increased if the workflow fails to execute due to time out error. This is not a mandatory field. |
||
|
MISC |
Display Name: Displays the name of the activity. You can also customize the activity name to help troubleshoot issues faster. This name will be used for logging purposes. |
|
|
SkipOnError: It specifies whether to continue executing the workflow even if it throws an error. This supports only Boolean value “True or False.” True: Continues to execute the workflow irrespective of any error thrown. False: Stops the workflow if it throws any error |
||
|
Version: It specifies the version of the web automation feature in use. |
||
|
OUTPUT |
Result: Defines the condition that you prefer to validate. This shows the success state of the activity. It supports only Boolean value. This is not a mandatory field however declare a variable to get the result. |
* Mandatory fields to execute the workflow.
Use Case
The secure set text can be used when the string or the text which the user sends
to the webpage are sensitive, confidential and needs to be encrypted. The
following example illustrates how we are going to enter the username and password
to login to the RobilityManager site using the Secure set text activity. Here we are
creating two variables in string type for Username and password and then use it in
the secure set text activity using a syntax.
Steps to execute a bot
Variable creation
The following steps helps you to understand how a string variable can be converted
to secure string.
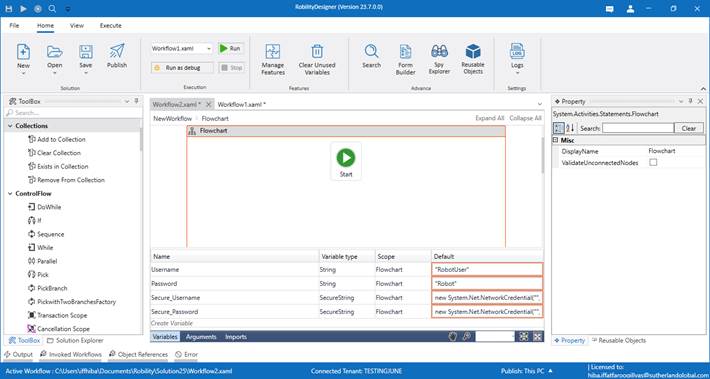
1. Create a variable with string as “Username” and the default value as
“RobotUser”.
2. Create another variable with string as “Password” and the default value as
“RobotPassword”.
3. Now, create a variable with Secure string type as “Secure_Username”.
Find the below gif to see how to choose the secure string type.
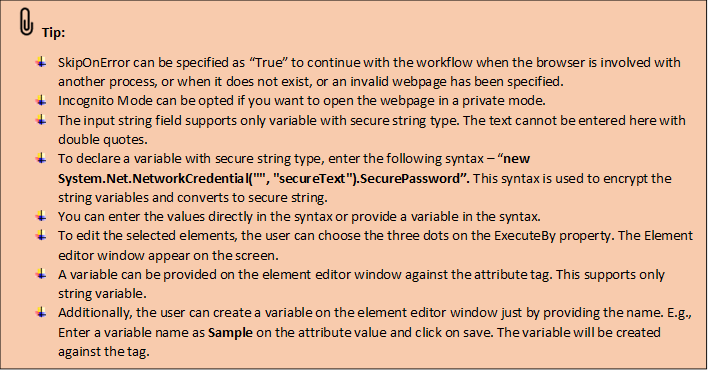
4. Enter the default value as “new System.Net.NetworkCredential
("", "Username").SecurePassword”.
5. Create another variable with Secure string as “Secure_Password” and
enter the default value as “new System.Net.NetworkCredential
("", "Password").SecurePassword”.
Let’s get into the steps to execute the bot,
Here we are using the variables created above in the following steps.
1. Drag and drop the Open Web browser activity to the workflow.
2. Double click on the activity and enter the URL as “Robility-Manager
(sutherlandglobal.com)” then click on Go.
3. Drag and drop the Secure set text activity to the workflow.
4. Double click on the activity and click on the select the element hyperlink.
5. You will be directed to the browser page, detect over the Username field
on the webpage.
6. Choose the attributes and click on Save button.
7. Enter the input string as Secure_Username variable here.
8. Now, Drag and drop another Secure set text activity to the workflow.
9. Double click on the activity and click on the select the element hyperlink.
10. You will be directed to the browser page, detect over the Password field
on the webpage.
11. Choose the attributes and click on Save button.
12. Enter the input string as Secure_Password variable here.
13. Add a click event activity to the workflow and connect it below the secure
set text.
14. Double click on the activity and click on the select the element hyperlink.
15. You will be directed to the browser page, detect over the Login button on
the webpage.
16. Choose the attributes and click on Save button.
17. Save the workflow and execute it.
The bot executes the workflow and launches the browser then proceeds
to enter the username and password.