
This activity assists the user in capturing a 'screenshot' of the page or application
currently displayed on the screen. Users can then refer to these screenshots to
identify problems, track changes and troubleshooting purposes.
Technical Reference
|
|
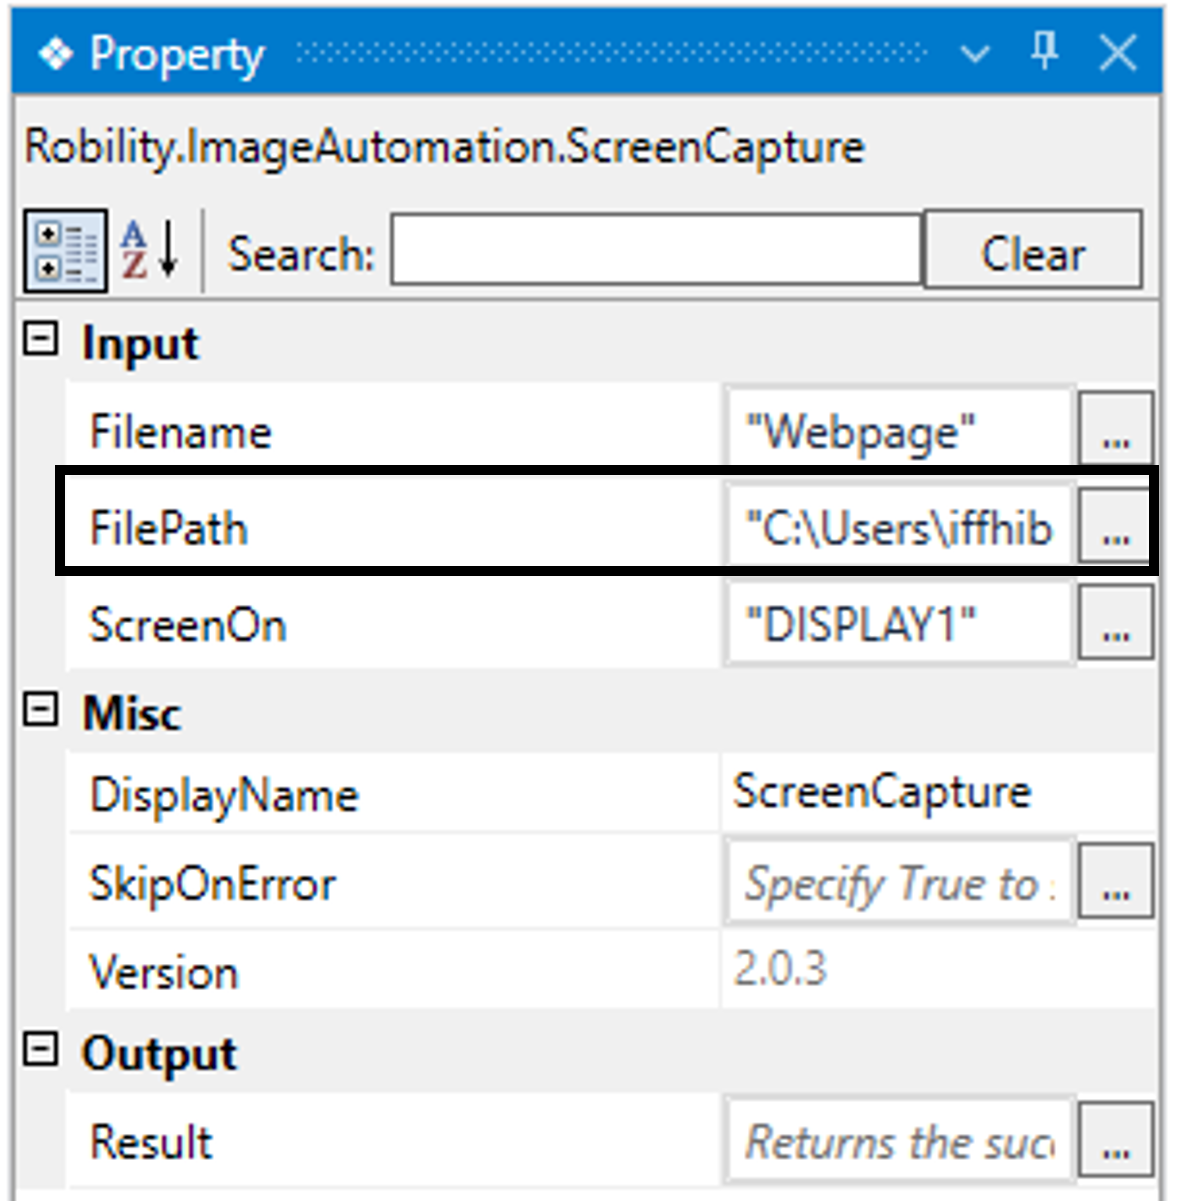
INPUT |
Filename: Indicates to provide the “Name” of the file against which the image needs to be stored. It accepts values in the “String” data type. You can either hardcode the value in a string variable or input the “String” value here. |
|
FilePath: Indicates to provide the “Path” where the image needs to be stored. It accepts values in the “String” data type. You can either hardcode the value in a string variable or input the “String” value here. |
||
|
ScreenOn: This parameter is useful when the user has dual screens. Select an option from the drop-down menu: Display1: Indicates taking a screenshot of the screen displayed on screen 1. AllScreens: Indicates taking a screenshot of the page/application on both screens. When left blank, it will default to 'screen1' displayed in front." |
||
|
MISC
|
DisplayName: Displays the name of the activity. The activity name can be customized, which aids in troubleshooting. |
|
|
SkipOnError: Specify the "Boolean" value as "True" or "False."
True: Continue executing the workflow regardless of any errors thrown. False: Halt the workflow if it encounters any errors. None: If the option is left blank, the activity will, by default, behave as if "False" were chosen. |
||
|
Version: It indicates the version of the feature being used. |
||
|
OUTPUT |
Result: It provides the ability to view the execution status of the activity. It returns values in "Boolean."
True: Indicates that the activity has been executed successfully without any errors. False: Indicates that the activity has been unsuccessful due to an unexpected error being thrown. |
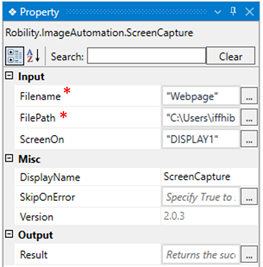
* Represents mandatory fields to execute the workflow
Here's an example of how the “Hold” function works in the workflow –
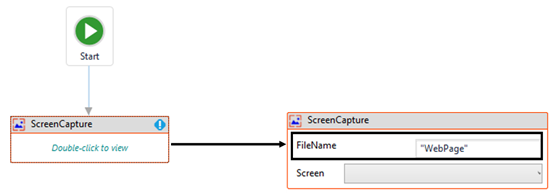
The following is a simple example that demonstrates how to take a screenshot of
the “Sutherland” website on google chrome.
1. Create a solution for building a workflow.
2. Install the "Image Automation" feature from the "Manage Features" menu.
3. Drag and drop the "ScreenCapture" activity onto the designer pane and set it
as the “Start Node.”
4. In this case, I am taking a screenshot of the “Sutherland” website launched on
the google chrome browser.
a. Double-click the activity.
b. Here, I am providing the name of the file as “Webpage” to save the image in it.
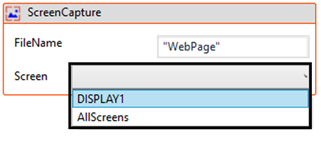
c. Moving to the next field, “Screen”, here I am choosing the option as “Display1”
from the drop-down.
d. Next, navigating to the “FilePath” in the properties of “ScreenCapture” activity to
provide the path to store the image.
i. Here, I have specified the path as my personal desktop path.
5. Now, to view the “Image” stored, you can use “DoubleClick” activity.
Click here to know more about the activity.