The below documentation helps to create the "Credentials" for the "Application" in the
"Credential Manager" using the "Web form" and "Excel upload" method.
Steps to configure vault key for a specific project
using "Web form" method
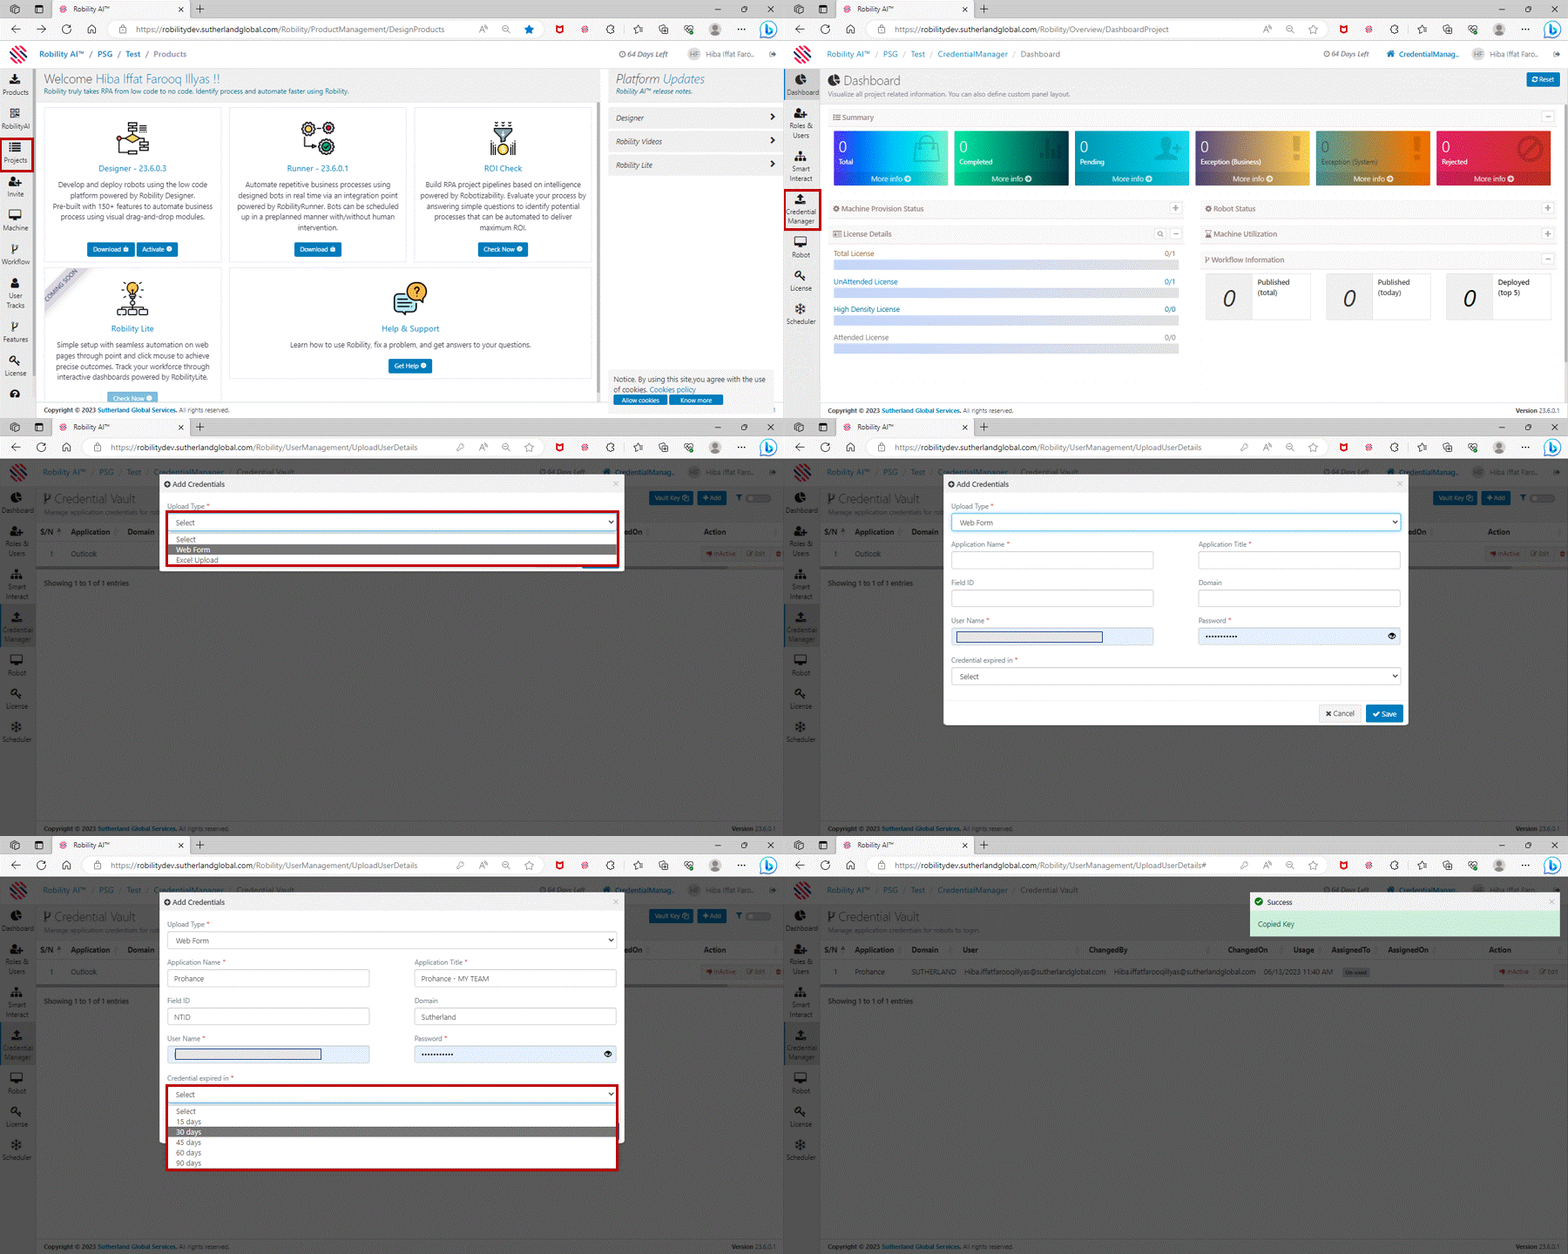
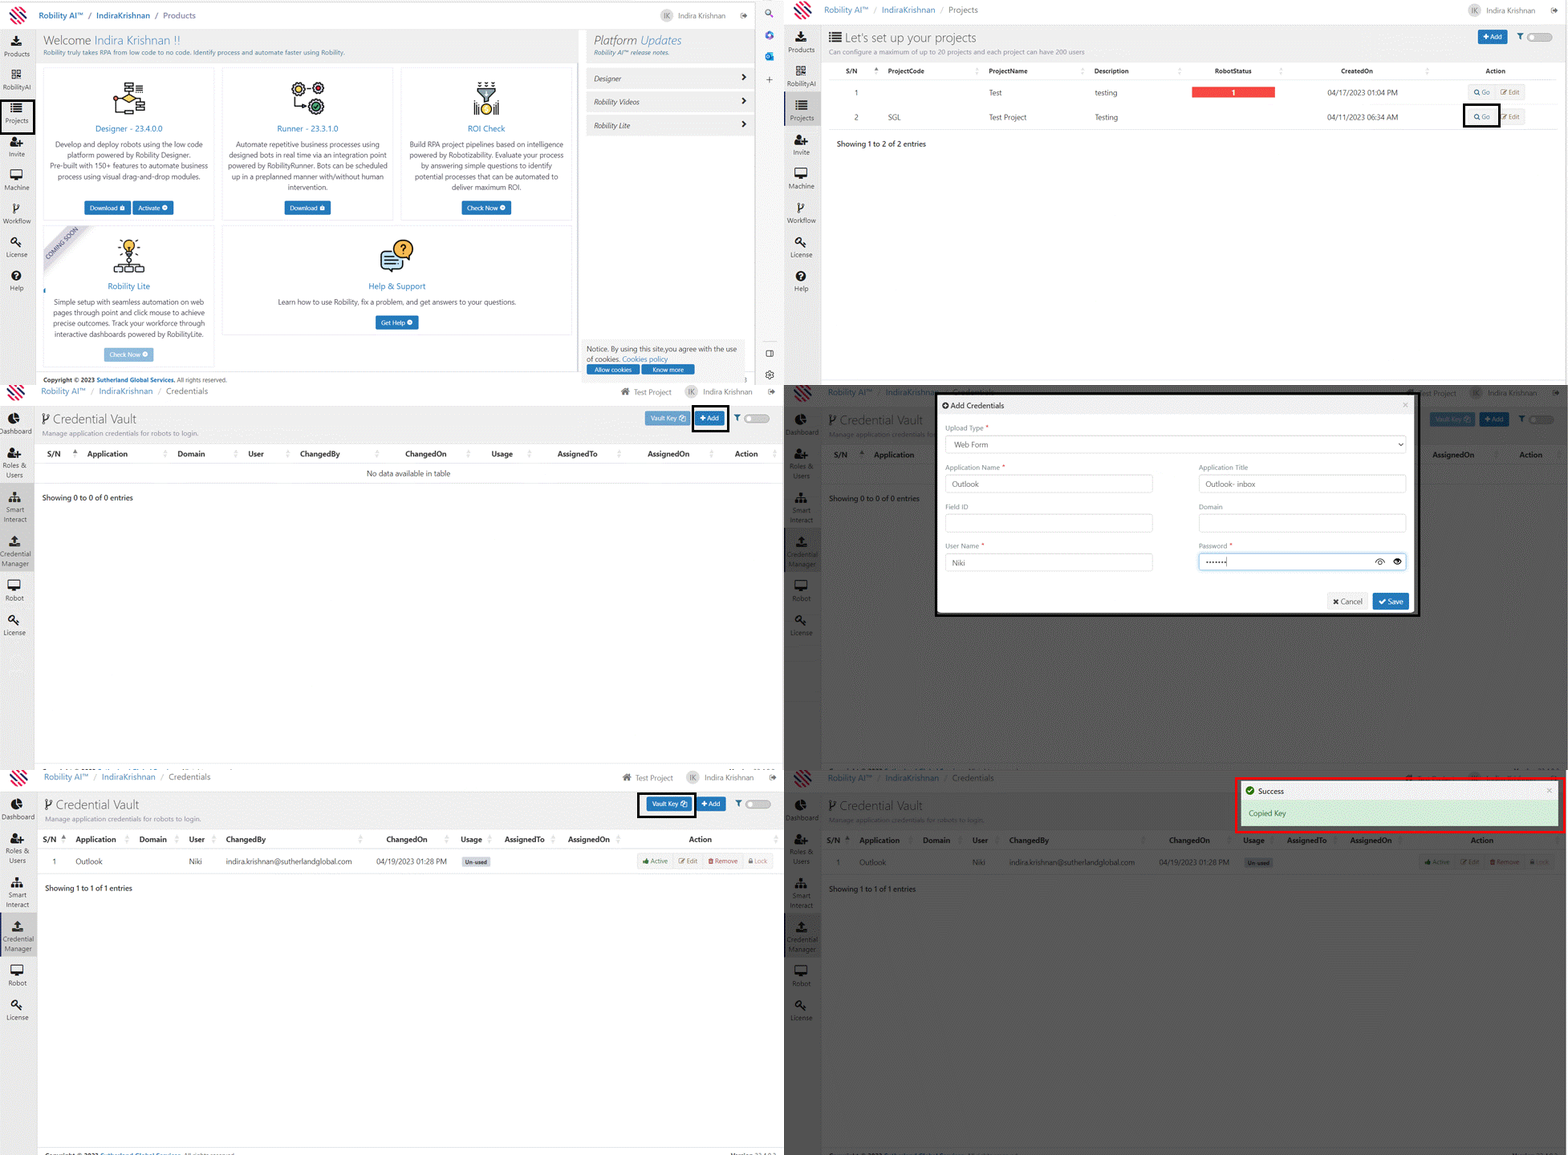
1. Click on “Projects” from the left-hand side menu bar.
2. Add a “new project” or click on “Go” from an existing project.
3. This navigates to the “Command Center.”
4. Click on “Credential Manager” from the left-hand side menu bar.
5. Now click on “Click here to configure,” to add the credentials if your project
has not yet configured the “Credential vault”.
a. If the project has already configured the “Credential Manager”, it will be
navigated to the “Credential Vault” page.
6. Click on “Add” from the right-hand side top corner, to start adding the credentials.
7. Choose the “Upload type” as “WebForm” as we are going to add a single
credential for the application.
a. Mention the application name and title for which the credentials has to be set.
b. The field ID and domain field are not mandatory.
c. Mention the username and password to be set for the above-mentioned application.
d. Select the “Number of days” the credential needs to be expired from the
“Credential expired In” drop-down.
8. Click on Save.
9. Once saved, the vault key is enabled, which can be copied by just clicking on it.
View the Gif below to see how to access the credential manager and get the vault
key using web form method.
Steps to configure vault key for a specific project
using "Excel upload" method
1. Click on “Projects” from the left-hand side menu bar.
2. Add a “new project” or click on “Go” from an existing project.
3. This navigates to the “Command Center.”
4. Click on “Credential Manager” from the left-hand side menu bar.
5. Now click on “Click here to configure,” to add the credentials if your project has
not yet configured the “Credential vault”.
a. If the project has already configured the “Credential Manager”, it will be navigated
to the “Credential Vault” page.
6. Click on “Add” from the right-hand side top corner, to start adding the credentials.
7. Choose the “Upload type” as “Excel upload” since we are going to add multiple
credentials for the application under the same project.
a. Download the “Sample template” available in the “Add screen” and enter all the
required credentials in the same format.
8. Save the file and then click on “Choose file” from the add screen.
9. Choose the file in which the details are entered and then click on “ok.”
10. Then click on “save” from the add screen.
11. Now the credentials for all the users in the excel file are added.
12. Once saved, the vault key is enabled, which can be copied by just clicking on it.
View the Gif below to see how to access the credential manager and get the vault
key using excel upload type.


